Welcome to the Two Rivers Garden!
... or at least, the future Two Rivers Garden. I'm Lori, and I just moved into my new home, which is near both the Feather and Yuba Rivers in northern California. I'm in an area which is dominated by fruit orchards, and which has nearly perfect weather for year-round gardening.
I'm an organic gardener who has, for years, been an apartment-dweller, working in small space gardens and rented community garden plots. For all this time, I've been dreaming up my perfect garden. I'm starting small, and going from there; I have visions of fruit trees and grape vines done in espalier surrounding a myriad of raised beds filled with vegetables. But one has to start at the beginning, and in this case, the beginning was mowing down nearly a foot and a half of overgrown grass in the back yard; that part, at the very least, is done.
I've begun the process of constructing four raised beds, insofar as I have the parts for the beds themselves; untreated lumber is still being cut to length, the corner posts are being placed after much measuring of the available space, and two composters (one stationary - a Redmon Green Culture 65-gallon compost bin, and one tumbling - a Yimby Dual-Chamber Tumbler Composter) are either here or on the way. Eventually I'll be constructing a vermicompost habitat as well, as I used to vermicompost on the balcony of my old apartment, but since I finally have space for a tumbler and stationary composter, I figured I'd start with those.
While I'd originally thought to build my raised beds in either cedar or redwood for their longevity, the plan changed to Douglas fir due to expense; fir is relatively long-lasting, it's not pressure-treated so nothing will leach into my soil, and it's a third of the cost of comparable redwood or cedar in this area. My husband and I are cutting 2"x6" boards into four foot lengths for this project. The corners are concrete blocks from Home Depot that are designed for the purpose of creating planters; they're six inches tall, eight inches wide at their widest point, and have indents on all four sides to hold a 2" thick piece of lumber. I'm doing multi-level beds; the front portion will be 12" deep, and the back portion will be 24" deep; this allows me to grow taller plants like tomatoes, etc in the front, root vegetables or salad greens in the back. They kind of look like this:
 The top image is literally looking down on the raised bed; the bottom image is a rough side view just to hint at how it'll be laid out. However, the top image also shows how the blocks work; there's a hole in the center of each block that's designed to have rebar put down through it to help secure stacked blocks together in place, and the boards just slide in.
Presently, my intention is to fill these with a good garden blend of soil from Four Seasons Landscaping Supply up here in northern California; they have a blend which is made up of screened topsoil, sandy loam, aged forest humus, chicken and dairy manure, peat moss, wheat straw, rice hulls, and gypsum. I've gone and checked the blend out in person, and it seems to be just about perfect as a start for these beds; well-draining, fluffy gardening material with lots of nutrients in the soil. In the future, I would like to add more raised beds beyond my initial four, and I might change up the blend for those, but this will work really well to get me started.
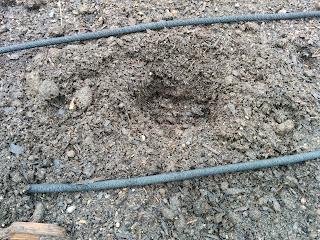
My current hurdle in building these is designing an irrigation system. I have one hose spigot in the backyard; while I can run a splitter off of that so that I can still use the hose, I'm going to have to run PVC piping to each of the beds. That means I have to essentially lay out the beds in place, get the measurements done so that I know how much PVC pipe and pipe fittings I need to pick up, and then we have to pipe them. The current plan is to have it so that each section on a bed is on its own ball valve, so that if I don't want that area to be watered, I can turn off the valve at the bed to prevent it; I plan on running soaker hose from the PVC through each section of the beds. But first, I have to get enough boards cut so that I can get the beds marked out and do the required measurements; then we can trench and run the pipe.
This style of bed goes together like a set of Legos or Tinkertoys, so it's not difficult, and it should hold up very well; it also means that if I ever need to replace a board, there's no unscrewing or nail removal needed.. just slide out the board and pop a new one in place.
So there you have it -- a quick introduction to me, as well as an introduction to the project in progress. I hope you'll follow along with me as I develop this garden and fill it full of lots of vegetables and fruit!
(Note: I am not affiliated with any brands or businesses mentioned in this post except as a customer; they didn't pay me or give me anything to mention them!)
... or at least, the future Two Rivers Garden. I'm Lori, and I just moved into my new home, which is near both the Feather and Yuba Rivers in northern California. I'm in an area which is dominated by fruit orchards, and which has nearly perfect weather for year-round gardening.
I'm an organic gardener who has, for years, been an apartment-dweller, working in small space gardens and rented community garden plots. For all this time, I've been dreaming up my perfect garden. I'm starting small, and going from there; I have visions of fruit trees and grape vines done in espalier surrounding a myriad of raised beds filled with vegetables. But one has to start at the beginning, and in this case, the beginning was mowing down nearly a foot and a half of overgrown grass in the back yard; that part, at the very least, is done.
I've begun the process of constructing four raised beds, insofar as I have the parts for the beds themselves; untreated lumber is still being cut to length, the corner posts are being placed after much measuring of the available space, and two composters (one stationary - a Redmon Green Culture 65-gallon compost bin, and one tumbling - a Yimby Dual-Chamber Tumbler Composter) are either here or on the way. Eventually I'll be constructing a vermicompost habitat as well, as I used to vermicompost on the balcony of my old apartment, but since I finally have space for a tumbler and stationary composter, I figured I'd start with those.
While I'd originally thought to build my raised beds in either cedar or redwood for their longevity, the plan changed to Douglas fir due to expense; fir is relatively long-lasting, it's not pressure-treated so nothing will leach into my soil, and it's a third of the cost of comparable redwood or cedar in this area. My husband and I are cutting 2"x6" boards into four foot lengths for this project. The corners are concrete blocks from Home Depot that are designed for the purpose of creating planters; they're six inches tall, eight inches wide at their widest point, and have indents on all four sides to hold a 2" thick piece of lumber. I'm doing multi-level beds; the front portion will be 12" deep, and the back portion will be 24" deep; this allows me to grow taller plants like tomatoes, etc in the front, root vegetables or salad greens in the back. They kind of look like this:

Presently, my intention is to fill these with a good garden blend of soil from Four Seasons Landscaping Supply up here in northern California; they have a blend which is made up of screened topsoil, sandy loam, aged forest humus, chicken and dairy manure, peat moss, wheat straw, rice hulls, and gypsum. I've gone and checked the blend out in person, and it seems to be just about perfect as a start for these beds; well-draining, fluffy gardening material with lots of nutrients in the soil. In the future, I would like to add more raised beds beyond my initial four, and I might change up the blend for those, but this will work really well to get me started.
My current hurdle in building these is designing an irrigation system. I have one hose spigot in the backyard; while I can run a splitter off of that so that I can still use the hose, I'm going to have to run PVC piping to each of the beds. That means I have to essentially lay out the beds in place, get the measurements done so that I know how much PVC pipe and pipe fittings I need to pick up, and then we have to pipe them. The current plan is to have it so that each section on a bed is on its own ball valve, so that if I don't want that area to be watered, I can turn off the valve at the bed to prevent it; I plan on running soaker hose from the PVC through each section of the beds. But first, I have to get enough boards cut so that I can get the beds marked out and do the required measurements; then we can trench and run the pipe.
This style of bed goes together like a set of Legos or Tinkertoys, so it's not difficult, and it should hold up very well; it also means that if I ever need to replace a board, there's no unscrewing or nail removal needed.. just slide out the board and pop a new one in place.
So there you have it -- a quick introduction to me, as well as an introduction to the project in progress. I hope you'll follow along with me as I develop this garden and fill it full of lots of vegetables and fruit!
(Note: I am not affiliated with any brands or businesses mentioned in this post except as a customer; they didn't pay me or give me anything to mention them!)

Comments
Post a Comment